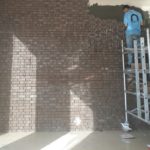
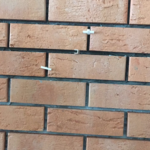
Whether you are a DIY enthusiast or a contractor, knowing the how to use the tools of your trade is a must. Embarking on a project without doing your homework may prove to be a costly and time-consuming move. Whether decorating your bedroom with a fresh coat of paint or upgrading your kitchen work surfaces, you will need to know the A-Z of preparing for a home renovation project. Installing brick slips for internal and external cladding is no different. Here is a simple guide to ensure you get your brick slips installed with minimal extra cost or stress.
1.What tools do I need?
Ensure that you have everything on hand to successfully prepare to install the brick slips. You will need a tape measure, pencil, trowel, level and boat level, spacers (size of your choice) and a pointing iron.
2.How many bricks do I need?
Calculating the number of brick slips required for your project is equally important as the tools. Measure the brick slip in length and width to see how many bricks you can fit into meter square area and then multiply it by how many meters squared your project is.
3. What adhesive should I use?
The adhesive used to apply the brick slips to any surface is known as mortar. This is made from a simple cement and water base mixture. You can also add sand or lime to the mixture.
TIP: If you are attempting a more complex design – using brick slips on the underside of an archway or for a corbeling design, for example – you can also add universal P.V.A Glue to the mixture for that extra hold.
4. Applying the bricks to the surface.
Apply the adhesive to the back of the brick slip using a trowel. Place the brick slip onto the wall move the brick carefully from side to side and press hard to ensure it has attached to the surface. Add two spacers underneath the brick and one at the side separating it from the previously laid brick slip. This ensures that the bricks are all laid equally apart from one another. After every two applications, check that the brick slips are being laid straight by using a boat level. Adjust any brick slips accordingly to ensure they are all level and in a straight line.
TIP: Ensure that the surface you are working on is clean and smooth before you begin. You can do this by simply running a scraper over the wall to smooth out any uneven or textured areas.
View more project images
4. Grouting
Once the surface has been completed – be it external cladding wall, or an indoor feature wall – you can then begin the grouting stage. This is done by removing all the spacers and filling in the gap between the brick slips with mortar. You can add the mortar mixture between the gaps do this by using a trowel or by using grout bags.
After grouting, you can leave the wall to dry for approx. 1 hour, depending on the climate. When you return, the grout should be less moist and workable. Now, take a pointing iron and run it along the joints to smoothen out the mortar.
5. Final touches
Once the brick slips are secured and dry, make sure the brick slips are clean from any mortar that may have been transferred onto the face of the brick during installation.
TIP: You can use another brick slip or a broken piece of brick to remove any unwanted mortar from the brick face. Simply rub the brick onto the surface of the brick slip to remove the surplus mortar.
Brick slips are a popular and cost-effective choice for restoration of buildings, whether they are homes, offices or retail spaces, and can also be used for new build construction. Similar to traditional clay bricks, these lightweight cladding materials are easy to install and can be designed to produce a variety of finishes from rustic chic, to modern industrial. Available in a variety of colors and textures, these versatile bricks can be easily and efficiently assembled and installed within 2 – 7 days.
Al Diyar offers a range of brick slips as well as installation for projects. We specialize in indoor and outdoor wall cladding. For more information or for a quote contact us today!


I like how you mentioned that knowing how many bricks you need is as important as having the right tools. My father-in-law was hoping to have some brickwork done on his property. He’s thinking of reaching out to some masonry contractors for help.